My name is Robert Adams the owner of Higher Contrast Photography and this is my Blog designed to help others learn photography and to show my business.
Apparently I posted this before I finished it, so here it is finished!
1/200 f5.6 ISO200
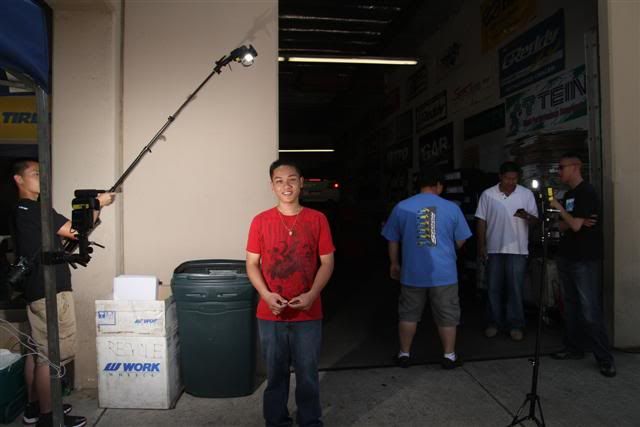
This is the first time shooting with cross light with a hair light for myself. I hope to make a boom to do this all the time in the furniture since my human boom, Arlin Wong, wont be there all the time.
What was used was three of my Nikon SB-28's on Manfrotto grip equipment and lighting stands aimed at my friend Tom, a Honda S2000 owner. These series of photos was just a quick experiments too see what I can do with direct camera flash while photographing cars at Honda S2000 event. So far so good, but its extreamly rough to me. Check out later to see more of my work with 3 lights.
By all means this isnt the greatest of photos But this is the light set up: 3 Nikon SB-28's with Cybersyncs, 2 Manfrotto Nano Stands, lasty one superclamp and a tent leg ass seen in the photo. The first shot was with only the Nikon SB at the wall, seccond shot was the wall and the SB on my camera right, and lastly the third is a quick use of a hairlight. Check out how the test was.
1/200 f5.6 ISO200
Note: One flash at a wall
1/200 f5.6 ISO200
Note: One flash at a wall and one flash to his right. Subject moved more to camera right
1/200 f5.6 ISO200
Note: One flash at a wall, one flash to his right, and one flash above his head to try and show his hair.
This is but a start and with light modifiers would make some pretty drammatic photographs!
Here is a sneak peak of what I tried to so with my speed lights for cars!
Check back to see more of what I do with these flashes!
Today was a fascinating test to see if I could actually have the potential to make a long boom to use for some automotive photography shots! Apparently I can! This will give me the ability to do some crazy action shots for many different subjects!
Here i used two of my Woods PWER Suction cups, three of my super clamps, one tripod head, and a 5/8ths stud. I will be replacing the metal pipe that stands in at 5ft 10lbs for something more light weight and rigid.
Here are 3 Nikon SB-28's on one Bogen stand, 3 Bogen brackets, 1 Superclamp, and a DIY Photo "A" clamp. To trigger this 3sync cords are used with 2 splitters and 1 Cybersync.
So today I just had to try out my newly acquired flash units together out in the sun because that is one of the ways I want to use these flash units! A friend of mine has mentioned, "why the heck use 3 of these things when you could just use one 580exII that you already have?" There are so many reasons to use these flashes over my 580ex. One of the main reasons to get the same flash exposure I can have faster recycle times between shots because I don’t need at 3 flashes to be at the same power to get the same exposure as the 580ex. Another reason is that since there are more flashes, I could increase the flash output to get flash units farther away from my subject so if I need to include more subjects in the photo I can have the flash farther away and light them all the same. And besides that I could just add effects to these things like gels, snoots, and grids and on one light stand I have three different things going on! All for less than a 580exII! Damm it’s crazy!
Today's test with my power of 3 small old school Nikon sb-28's on a light stick is to underexpose the background to show the sky and to then light up my model, being my brother with his permission, to be 2 stops if not more brighter.
1/250 f8 ISO100 3 SB-28's at 1/2
Here is a successful test shot acquired by using my camera at ISO 100, f8 at 1/250. All of the Nikons were set at 1/2 power and was about 5-6 feet away. Not too bad, but I want the darker so lets close the aperture.
1/250 f11 ISO100 3 SB-28's off
Here the background is kind of where I want it. Now to turn on the strobes. I thought a good start was 1/2 based on the sun and how many flashes I had in use. Flash again is set about 5-6 feet away from my subject.
1/250 f11 ISO100 3 SB-28's at 1/2
Starting to get somewhere, but I want my subject brighter, this is acceptable but its not dynamic enough for my tastes. Time to crank up all three to full and see what happens.
1/250 f11 ISO100 3 SB-28's at Full
Bingo! This is what I want! Great dynamic light with only 3 flashes. If I were to retake this shot again, I would introduce a reflector on the side of my brother to bring out more detail to the left of the subject, but all in all, pretty good for me!
Some debate I had is what would a 580exII look in this situation with the same settings? Well here is what it is like. Set up is generally the same with the flash about 5-6 feet away from my brother set at full power.
1/250 f11 ISO100 580exII at Full
The shot looks quite dim, like my Nikon's at 1/4 or 1/2 power at the same distance. I decided to move the flash in closer about 3 feet from my brother above his head and this is the result:
1/250 f11 ISO100 580ex at Full Note: Moved flash closer
Much better exposure but there are some key things that I don’t like. One I don’t have those highlights anymore, I need another flash to get them back or move this thing even closer. Another detail is that there is less coverage with the light. The nikons were zoomed out wide, but there were 3 aimed in the same general direction, one 580ex doesn’t give that same coverage that close zoomed at 24mm but still it can be done!
There are many way to lighten up a shot, but for me I been lucky to get these flashes for cheap! Use what you guys got because the best equipment to take pics is the stuff you have! But you got to admit that to take some shots you need to buy certain equipment.
Stay tuned to see more about what I do and how I do it!
Four newly acquired Nikon SB-28DX's labeled for keeping track of the units.
Yep I took the plunge and purchased 5 more Nikon SB-28DX flash units. Why you might ask? Because it gives me allot more options when making a photograph. There have been many times where one flash unit was just not enough, forcing me to raise my ISO, or open my aperture losing the focus I wanted. If it was not effecting my settings then I was saying to myself that "I could really use another speedlight here" to add more light or drama to a photograph. Lastly another technique I could do is double up on flashes to lower the amount of power needed by a flash unit so I can have a faster recycle time. But now my only problem is having enough triggers to use them all!
1/8th inch headphone splitter from RadioShack
The main technique I will be trying to use is doubling up on flashes to reduce flash power for fast recycles or to increase power to lighten up a immge without compromising my camera setting to get the shot. But there is one big problem and that is my flash to trigger ratio. Right now its 7:3, and even though ill be doubling up I thought I would need a trigger for each, but that is not so! I found that the cybersync uses a 1/8th inch mono jack similar to what is used for stereo headphones. By using a "Y" plug splitter, it gives me the ability to stick to 1/8th to PC Sync cords to trigger my Nikon SB's
Attached to the headphone splitter is some Scotch yellow adhesive tape to make the piece more noticeable if I lose it as well as set it off from other photography equipment from other photographers. Also attached to the splitters is Velcro so I can put it on the side of a flash if I dont need to use it!
Here is three of my flashes trimmed up with the yellow tape to help me label my units, here I will try to link all three to run off of one Cybersync. What I am using is two splitters and three PC Sync cords.
Here it is all fixed up. When I have this up on a rig or bracket, the Cybersync will be sitting on one of the units. Lets see if this works!
WOW! Awesome! It works perfectly! Now I almost have the ability to reduce or increase my flash ability by 3x! With this know, i can use these in a combination to combat the sun. Ill show an example of that later on when I get to trying that technique.
Here is all seven Nikon SB-28DX's all trimmed up the way I want them to give them a personal touch! To elaborate why im using these flashes again is because they are reliable Nikon flashes, they are affordable, and they have a built in PC Sync to work with my camera with a Cybersync. There is no big rule on what flash you can use other than can it sync with your camera in some way, so use what you can get from Minolta, Pentax, Sigma or other companies, they will serve you well to have more power or to experiment with.
Now this is a very impressive spread to me. I look forward to using all of these flashes!
Well this was something really quick I did a while ago that should be shown as some examples of people since I been showing more and more cars. This was something simple using chairs in the living room and clamping to them to light John from 5 feet to his left and right. The flashes of choice are the SB-28's on manual and all of this was direct harsh flash and wanted to experiment with it.
Many photographers find direct light too harsh, but I like it to some degree. With some people, it works out very well because their skin can handle it and not look too shiny or blown out. To make it even better is to not have the flashes in line with the camera lens, this always makes light look more natural or dynamic than the on camera method. Give it a try once and a while, it can lead to some really cool shots.
To start things off is with a light test I changed flash setting a few times but it was about 1/8th or 1/6th in a 1:1 Ratio.
1/60 f2.8 ISO800
Note: was allot more blown than it is now due to me forgetting about my ISO
John was so animated he wanted to get a indoor jump shot so I quickly closed the aperture to get a better exsposure at 800.
1/200 f7.1 ISO800
Note: Totally frozen in time
Now to get more serious about the shots. I reduced the ISO first to get cleaner shots and asked John for something serious and boy did I get it, or something like it. First shot is with the shutter open long enough to register the room behind him giving you an idea where he is.
1/60 f5.6 ISO200
Next I cut most of the lights, increased shutter to almost make it a black background the room behind him and close the aperture to reduce my flash.
1/200 f7.1 ISO200
This attempt I liked the look but wanted less background and less flash so I closed even further to f10.
1/200 f10 ISO200
For this last shot I cranked up the shutter to the max sync speed and threw on some gels for some mood.
1/250 f10 ISO800
Called it a day and went back home to have fun editing them.
I love my new addition to my photography equipment and that is reflectors! Im now a proud owner of a series of lastolite reflectors! The are so great I had to get a whole bunch of them. These can be used for many things from being a main light source, fill in light, or for other special effects.
The breakdown of my selection of reflectors I have are a variety of surface finishes in various sizes other than my only 48” reflector for now. In totally I have 8 reflectors, 4 20" reflectors for general use, 3 30" reflectors for larger objects or general use, and lastly one large 48" reflector for big jobs. There isn’t rules etched in stone how you should use a reflector, it just an aid for me to do my job better if the event calls for one.
Here is a view of a reflector opened.
Here is a view of my books using a dim fluorescent light above me:
1/60 f2.8 ISO800
Now my books using the same setting but with a reflector:
1/60 f2.8 ISO800 w/ a 30" gold reflector
Something to really note is that I am using this as a main light. Indoors with this type of light really does not do much except give you the ability to read the text better, however when using more powerful lights it gives that added fill to a picture because for the most part is almost full of light from my flash as a main source. There will be many examples of this later when I start using them more to give you examples of this technique of using a reflector combined with flash to achieve great looking photographs.
Now you might be asking why does a strobist need a cinema rig? My answer to that is I really don’t need it, but the hardware that made up this rig is of particular use to me!
What I bought was a rig that utilizes suction cups to mount onto any useable flat area. That can be anything from glass windows, flat wood tables and doors, or even metallic surfaces like cars! And since the pictures I have been taking are cars these days, it will work well for my hot shoe flashes!! Some of the suction cups have studs that are usable for anything that can clamp onto a stud and some have tripod heads screwed onto them and that is really useful for a camera or anything that uses a ¼ threaded screw!
Here is a close of the suction cups with studs. What I could use these for is my super clamps that can hold objects, umbrella brackets for my flash and modifiers, or to use joints to hold up arms to make a rig like this:
The kit I purchased is using allot of high end Mathews clamps and rods to make the jointed arms. I can slide them in and out, and articulate the joints to suit my mounting needs. The cups are Woods Powr Cups that I press on initially, and can pump out more air to get a stronger suction bond. Since my 7D can do video, this could be useful when doing actual video's.
Many think that suction cups have specific roles, but that is way too closed minded. These can be used for what I have described and beyond. The other three suction cups are the exact same cup but instead of a stud screwed onto the base it instead has a tripod head. This can be used for anything that uses the ¼ screw and that can hold a camera or a flash bracket. Here is a close up of those cups:
Here is a picture of these things in action on my bathroom mirror! What I am planning to use these on is a car so when I do action rolling shots I can still use flash! Updates on that will be coming later!
If that isn't enough for you, then here it is with a flash!
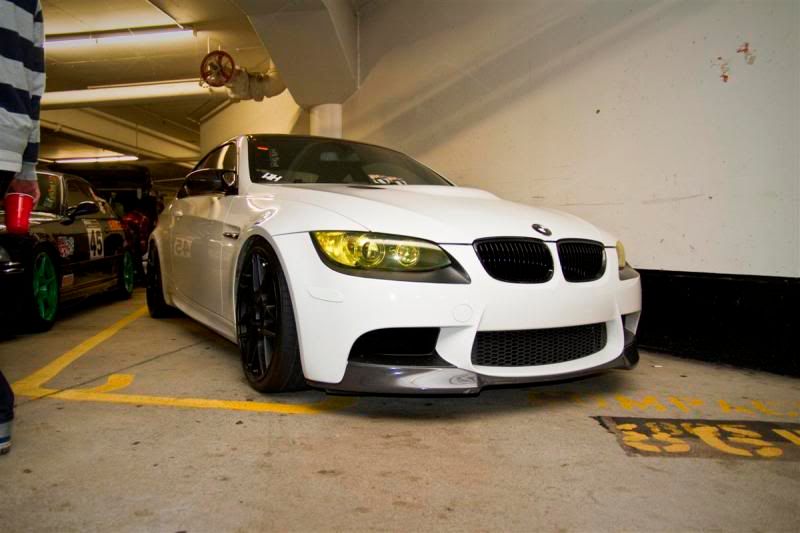
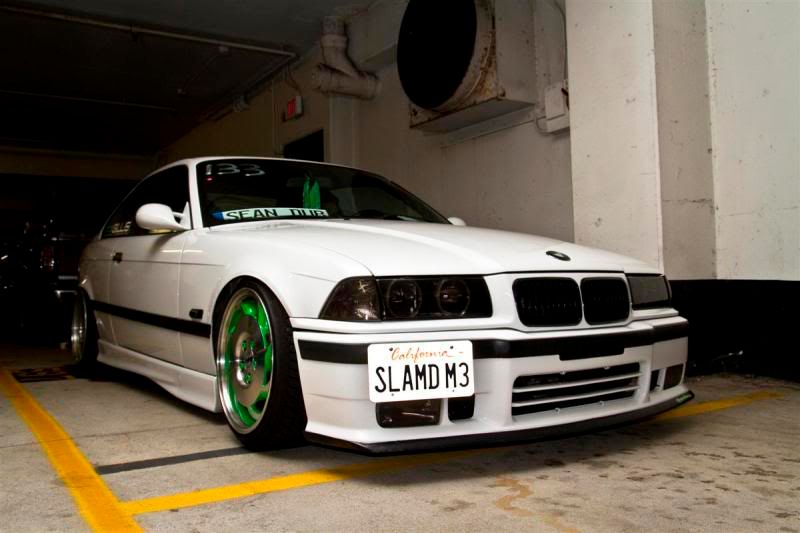
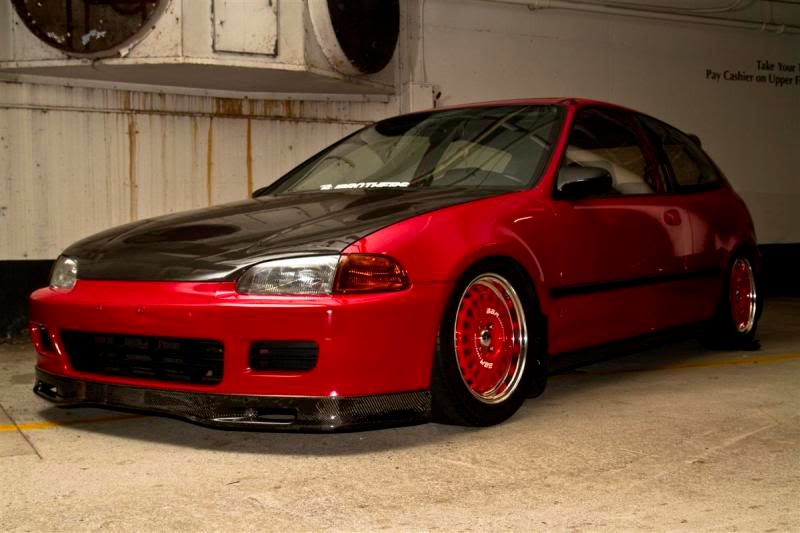
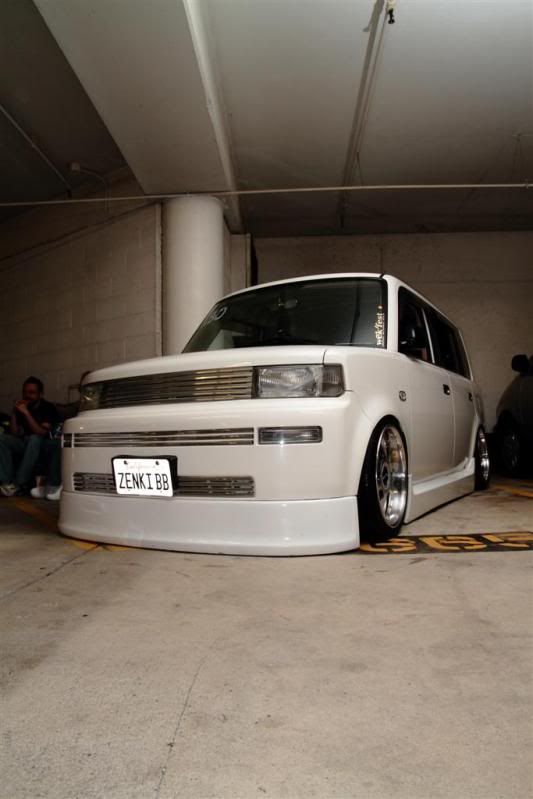
CRAP ANOTHER LATE POST! Eh, it really does not matter since I am just posting things up to share with everyone about my progress. This post is about the fun I had at WEK'FEST 2010 in San Fransisco. This Place was PACKED, like 2 to 3 times over the fire code of how many people should be at this event. But who cares? The meet was pretty smooth with lots of cars, girls, and the most DSLR's I have ever seen in one place outside Superbowl coverage photos.
This event I couldn't really shoot as much as I wanted since there was so many people around me! Literally there is someone always to any side of you! At times with some cars there was a photographer to the left, right, in back of me making me feel awkward, and someone in front of me ruining my shots, or someone below my legs getting some weird angles! If someone managed to be above me then I think I would of left this event... But this event was too awesome to leave so what I chose to use with this kind of environment was my Camera with a standard zoom. Since I cant go super wide or telephoto awesomeness it was the best choice paired up with a Manfrotto Nano Stand with my 580exII Flash as a slave perched on it gave me all the light I really needed. I could of had another flash but managing two light stands with this crowd is too difficult.
One of the reasons for using the 580ex is because it can work in a wireless slave mode with my Canon 7D. Using flash exposure compensation (FEC) I got the lighting I needed from this powerful 580ex. Now that I think of it, if I had another one these pictures would be twice as awesome! I aimed the flash head to the white painted ceiling and that gave me some cool light since when the light from the flash hitting the ceiling its pretty large as it comes down on a car. When you look at these pictures, my choice of FEC is totally subjective and it changes to shot to shot. The fact im shooting with ETTL, there is no knowing what the camera thought was appropriate in terms of power for the shot so when you use FEC check your screen and see how it effected your picture.
1/20 f5 ISO400
1/20 f5 ISO400
1/80 f2.8 ISO400
1/25 f8 ISO400
1/25 f8 ISO400
1/20 f8 ISO400
1/60 f5.6 ISO200
Borrowed another 580ex from another photographer and used it on him to show my wireless ability! Ratio is 1:4
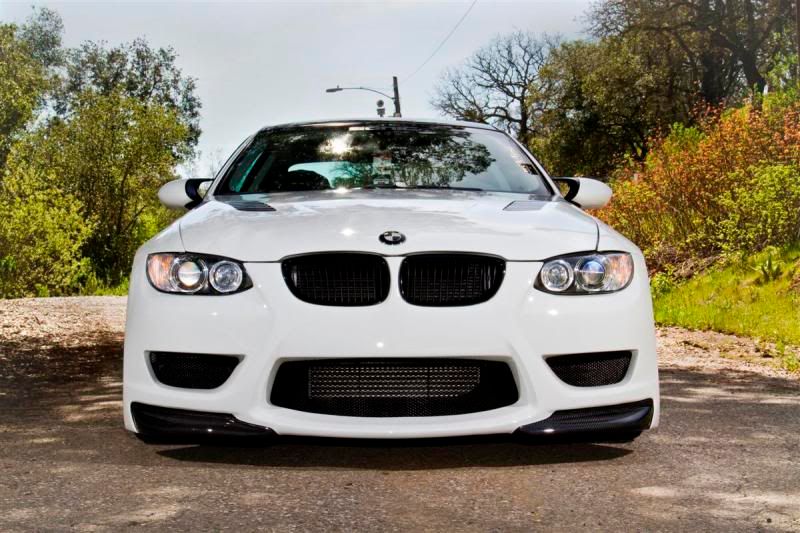
Yea, it’s an old event I did, but it deserves a spot on my blog. They are really nice photos that I took at EvergreenValleyCollege in San Jose with a friend named Arlin Wong, an aspiring photographer like myself that has an affinity with cars.
We decided to go to EvergreenCollege because it was just convenient. With the sun high in the sky, and hardly any clouds we first decided to drive in the back roads of the neighborhood and see what we could do for a photo shoot. Arlin took the liberty to do action shots as we were driving, but I decided to take a chance and do a photo shoot once we stopped. Basically because I was the driver, and I hope Arlin reciprocates and helps me out.
This shot was taken at the end of the road. I told one of Arlins friends to park their car in the shade to try out some outdoor shoots. This was done because the sun was way too bright and I could not really compete with it to make some dramatic lighting. Instead I used my surroundings primarily the trees to give me some good shade to knock down the background brightness by a few stops and to hit the car in question with some flash. I had the use of some human Light stands and I gave them each a Nikon SB and told them to aim it at the cars lights. It was a good quick and dirty shot because we quickly had to leave. These shots have minimal editing, just wanted to give it a try.
1/80 f16 ISO 200 Flash set at 1/2
Note: Since it cant be helped there is an electrical pole, dispite how I dislike it, we could photoshop it out later in post.
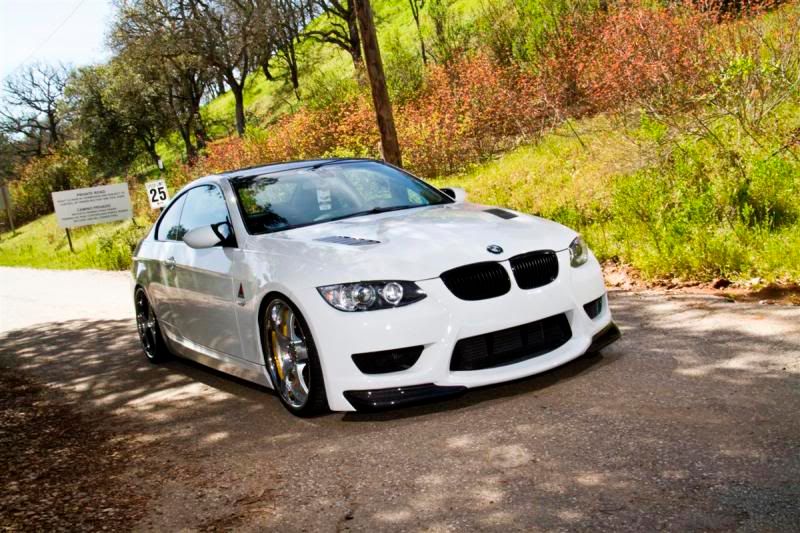
1/60 f16 ISO 200 Flash set at 1/2
Angle I chose wasn't as good, but needs better lighting to evenly lite the car.
1/60 f16 ISO 200 Flash set at 1/2
Angle is getting better but still two Nikon SB's were not enough.
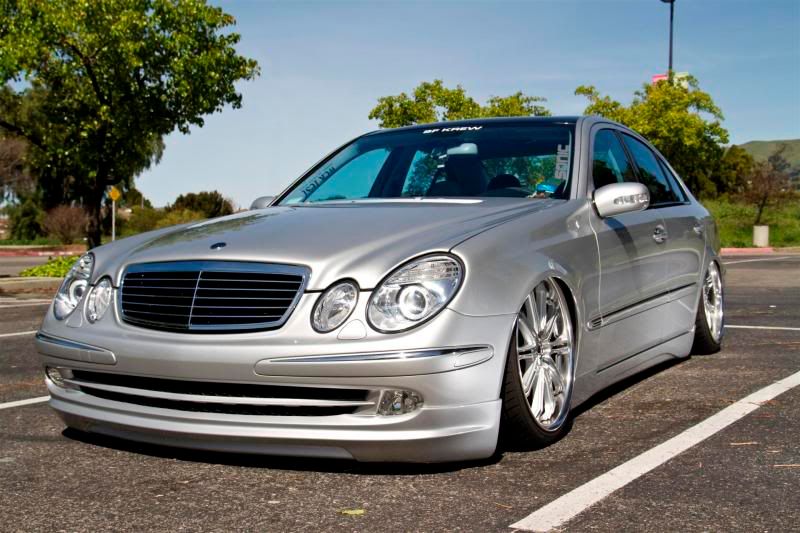
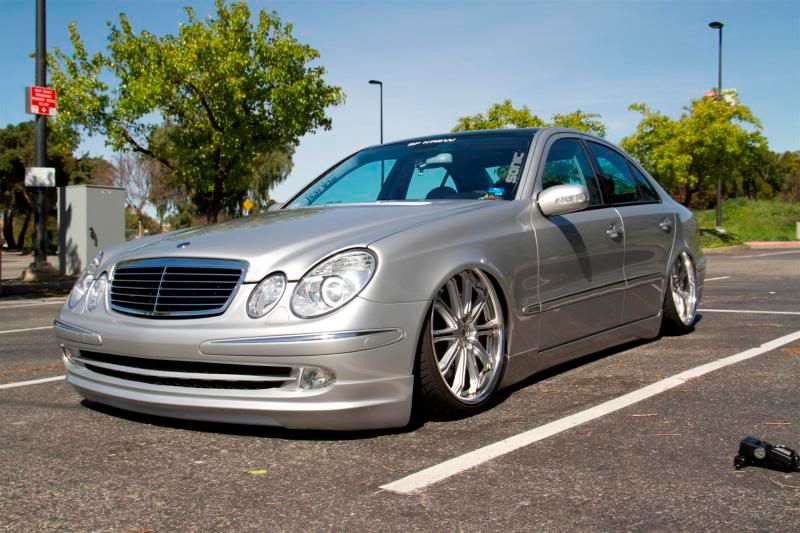
After standing around, now it was time to go to the College! Sadly I didnt take much pictures, but some of them were really good! I got to see a really slammed Mercedes Bens! I did some unique lighting techniques to really make it pop. In my opinion my shots almost have a HDR quality to them because of how I quickly tried to balance the light.
1/250 f8 ISO 100
Where I lighted the car was to take just two Nikon SB's and have them attack whe wheels where i had some on camera flash for fill on the bumper.
This is a look of how the lights were kind of set up. Yep, just on the floor did fine.
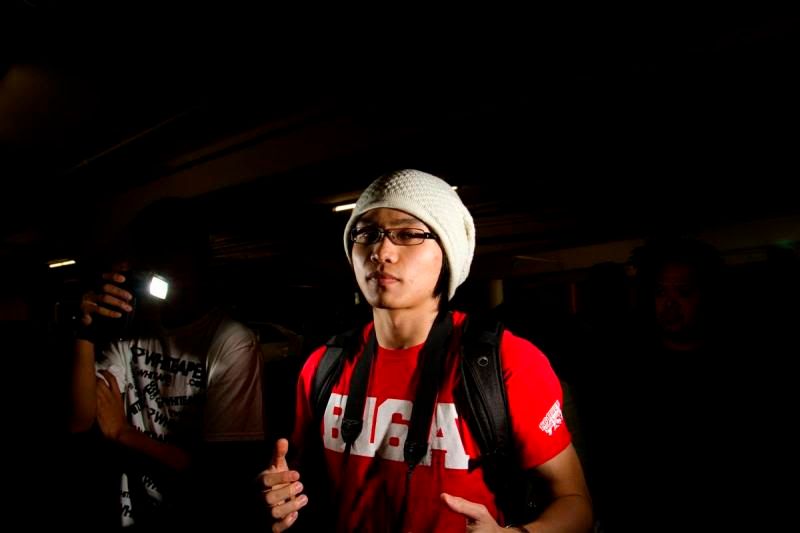
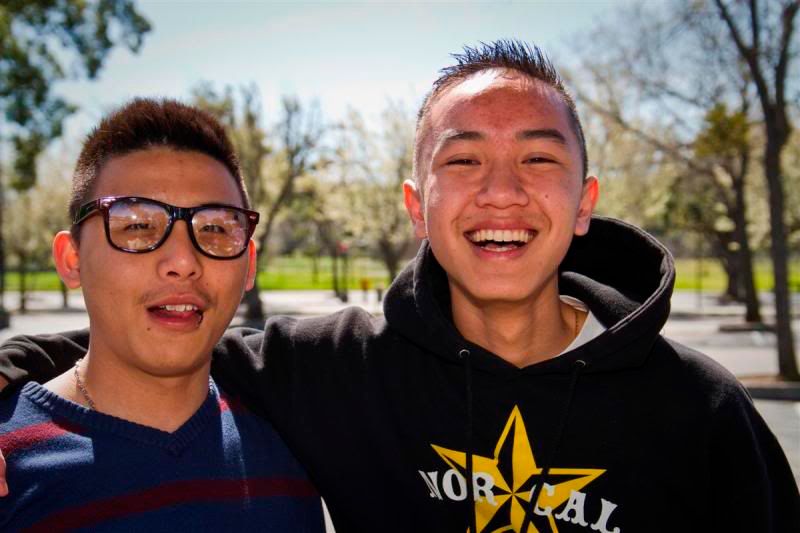
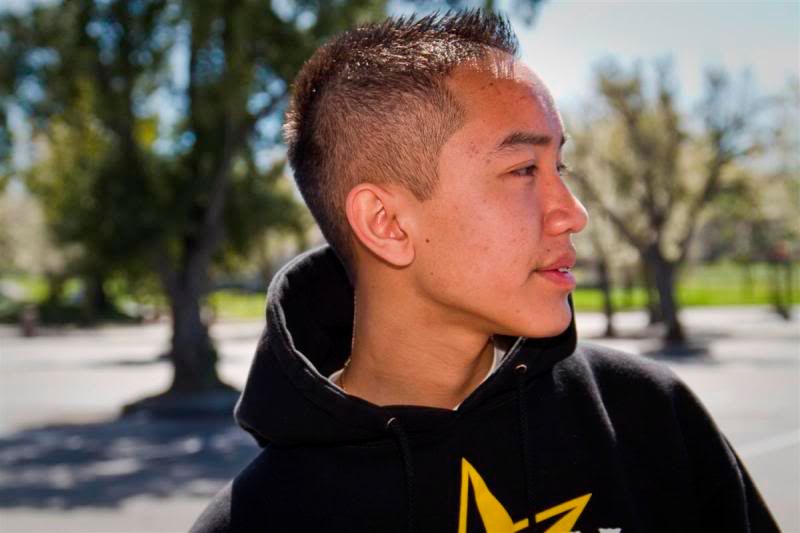
Next I had to do some people shots. This is of my friend Alex and Vince. I took these shots with on camera flash aimed right at their faces. Kind of harsh but I think using flash exposure compensation on aperture priority did just fine.
1/250 f5 ISO 100 used +1/2 FEC -1 EV
1/250 f5 ISO 100 used +1/2 FEC -1 EV
I think that is it for now. Stay tuned for more coverage of what I do!
I am a professional Photographer out of San Jose Ca providing some great photographs from portraits to events.
Follow my blog to find out more about my photography I am doing for the people I know and if you like you can learn some things about photography to help yourself! Dont be shy to comment or ask questions, I would love to chat!
If you want to check out my main site check out www.highercontrast.com