Thursday, May 20, 2010

My First Time to Get a Sunset Background

Hey everyone! This is a post in a long while and that is because I have a new bicycle! Well not really, I built it myself from old parts that people didn't want anymore, but to make it work for the blog I had to take a decent picture of it. And that is what these pictures are, just decent. I really not thrilled by these pictures because I waited too long for the sun to set and it did not give me colors I wanted. Next time I shall try again, and take pictures of a longbaord that I also purchased! But for now, this is a nice pic for me of my bicycle.

First thing I did was take a test shot of the sky on "P" mode on my Canon to find out where the sky was reading at on my camera. I then took these readings on the manual and tried to photograph my bike quickly before there was no sky left to use as a backdrop on my bicycle!
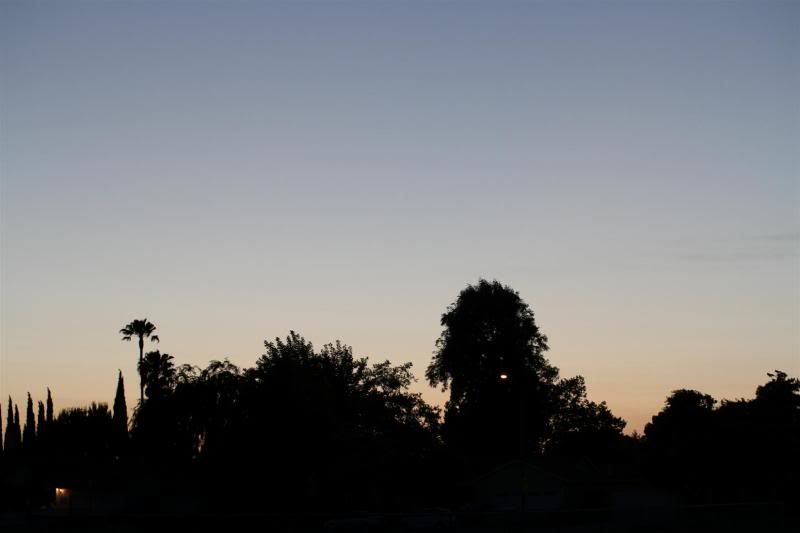
1/125 f3.5 ISO 400 (forgot to change ISO for the test)

Here is a shot of the bike with the flashes set at about 1/2 power. I ended up shooting the bike at 1/16 power but should of angled the flash head differently to prevent unwanted highlights. But hey, this time I was scared about losing the sky in my picture, so I tried my best in the time I had left.

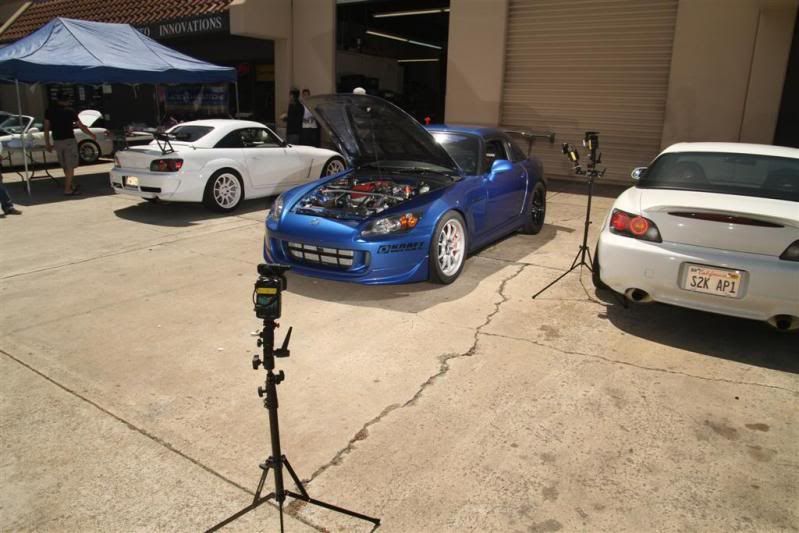
The set up was with two bare SB-28DX's aimed at my bike from the cameras left and right at about 45 degrees slightly higher than the bike.  Next time with better sky I will show a set up perhaps of this.
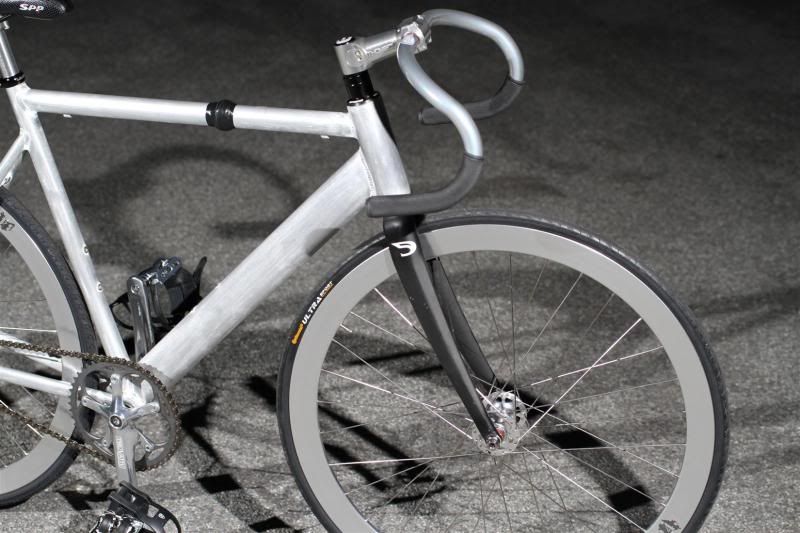
1/125 f3.5 ISO 400

Here is the shot with the aperture closed down a little and strait from the camera. After editing a little bit I got some more warmth into the picture as well as detail that was lost from the flash on the cameras left side on the bottom tube of the bike frame.

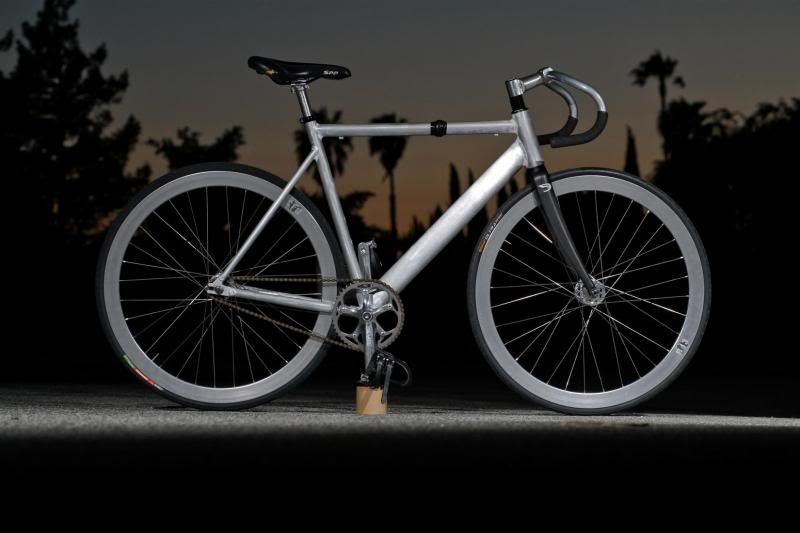
1/100 f5 ISO 400 Note: Original

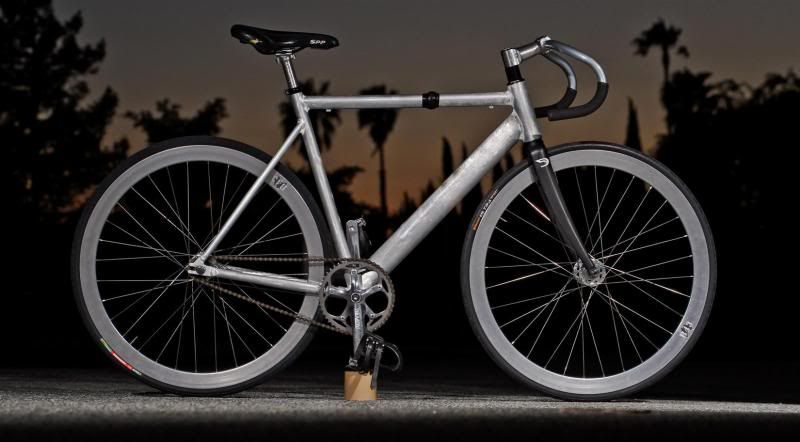
1/100 f5 ISO 400 Note: Edited

Remember to find appropriate reading to take a sun set photo. You have little time and because in a matter of setting up for 5 minutes has lost me allot of my background. Also mind your highlights on your camera, turn the warning on so you can easily see if what is going pure white is worth losing in the photograph. This is something that I have learned and now going to improve the next time I take a shot like this.

Keep watching to see what else I do with my camera!

Sunday, May 9, 2010

Yerba Buena High School Car Show

This was a neat show that was local in my area that I thought would be great to try more speedlight strobing. This time I thought it be proper to show some examples with and without strobes. Again I still need to use more, but I only have so much gear and my images will improve with more investments. Its hard to talk about flash power used because its constantly changed to try and balance things out so if any of you try doing this its the understanding how to take the power of a flash and mold its light output to make something stunning. By all means some of these pics are not the best but they are a step forward. Check it out:
1/250 f9 ISO 200 Note: using camera flash

1/250 f9 ISO 200 Note: Using all flashes

1/60 f14 ISO 100 Note: No flash

1/60 f10 ISO 100 Note: With Flash

1/100 f9 ISO 200 Note: No flash

1/80 f8 ISO 200 Note: With Flash


1/100 f11 ISO 200 Note: No flash

1/100 f11 ISO 200 Note: With flash

1/100 f11 ISO 200 Note: No flash

1/100 f11 ISO 200 Note: With flash
1/125 f14 ISO 200 Note: No flash

1/125 f14 ISO 200 Note: With flash used hood as a light source

1/125 f11 ISO 200 Note: With flash

1/100 f9 ISO 200 Note: With flash

1/100 f11 ISO 200 Note: With flash

Example of a set up at this event:
1/160 f9 ISO200
To produce this picture:

 1/160 f9 ISO200 Note: With Flash

 1/80 f11 ISO200 Note: With Flash

Old Pics of Honda S2000's with 4 speedlights

On April 25th I had a surprise invitation from a local photographer and S2000 owner about a meet in the bay area for just the Honda S2000! After having my new flashes for little under 2 weeks by then, I had to give it a shot. These were some of the first tests using these flashes to try to Highlight and fill in certain areas of a car.

Total flashes were used was 4 comprised of 3 Nikon SB-28DX's and one 580ex on my camera itself. All the shots were using direct flash. With harsh sun, it work with me to light up a car. The technique is to take a picture of the car and then use the flashes to fill in areas that you think need some help with more light, and hopefully you know what to look for and you got a picture.

This is the some of the first attempts I have had using these many flashes, and honestly I need more but that is ok since I have 6 Nikon SB-28's. With this kind of light set ups and using them directly to make them cover large areas I have to move them back from my subjects and zoom the flash head out. Sadly these small flashes cant compete with the sun, but they could in key areas like wheels and grills, and other tight darn areas. In general most of my flashes are zoomed to the widest being 24mm and putting them as close as I can to the car to make use of them without them being in the frame. Currently I still don't have Photoshop, so sometimes a light stand leg get in there, but that isnt much a problem for me since this isn't for something in return so I can take it easy. The Nikons generally fill wheel areas while another hits the front then I try my best to use my 580ex to fill in more areas that the Nikons miss. Check out the results from my first attempts!

1/250 f8 ISO200

1/250 f8 ISO200

1/250 f8 ISO200

1/250 f11 ISO200

1/250 f11 ISO200

1/250 f11 ISO200

1/250 f9 ISO200

 One example of light set up.

Saturday, May 8, 2010

How to make cars looks waxed, when really they were not.

As allot of people know about me is I really dont do much photoshop at all, because one I dont have it and I don't use it if I can help it. Allot of stuff can be done in camera it just takes a good eye when looking though that viewfinder to see what is right and wrong in the shot before taking it and acting like an ape after, reviewing the shot on your screen. Here I have tried many kind of flash techniques but this is often forgotten by many because its too bulky and that is using large umbrellas to make cars shine.

The big deal about using an umbrella is that it softens the light and isn't harsh because it is not direct. You can imagine light being harsh when you look at pics from photographs of people taken with a camera with just the pop up flash. That flash exposes everything! If you have a cut, a pimple, bad skin, lots of stray hairs, it will show with direct flash! If you were to apply this to a car, you would see soo much dirt and dust it looks ugly! Unless the car is clean, then you don't have to worry to much, but the overall finish will look dull if it isn't cleaned professionally.

What can be done is to take your flash off camera and put the biggest modifier you can on it! That could be anything from a a soft box, umbrella, a bed sheet, or a front windshield head reflector, ANYTHING! It will work better if it was designed to reflect flash light, but you must understand you will need major power to get some good shots because it will eat up some light. I personally had 60" umbrellas and small speedlights, but I can make them powerful by kicking up my ISO. Many photographers forbid you to go up in ISO because of how clean the file will look like once it gets onto a computer monitor, but honestly if you have a good enough camera and a good enough lens you can forget about it. Semi professional and professional cameras are designed to perform in high ISO settings so it only makes you more capable to take shots with many kinds of light sources in my case, speedlights. If you don't have something like that, hopefully you have a good noise reduction program and you will be fine for the most part.

Take a look at the results of direct light vs reflected light  and a quick pick of a few of the lights:

1/10 f8 ISO 200 Note: Direct flash

1/10 f11 ISO 400 Note: Using 60" Reflective Umbrellas

Set up:
One light and a umbrella aimed at the hood
One light and umbrella at front wheel
One light and umbrella at rear wheel

Friday, May 7, 2010

Fist try wtih Four Lights

This was a quick shot I did after washing my car. After re parking my car I chose to  use four Nikon SB-28's I tried making it even, and in some areas were "hot" from the flashes  that I couldn't see on my camera. all flashes were set to full power one aimed at the hood, one at the rear wheel, one on the side of the car, and one on the front wheel.

Going to try out more shots soon! Check out this progress!


1/250 f14 ISO200

1/250 f14 ISO200

1/250 f11 ISO200

Tuesday, May 4, 2010

New GEAR!!! Now I got a Grip on my Shots.


Just as the title says I now have a grip.

This thing is so amazing because it allows me to use my back up AA's in my camera now along with having two batteries to take my shots! If that isn't enough it make the action of taking portrait shots 10x better! MUCH more comfortable, easier to hold the lens, and stabilize myself.

Follow my blog to check out more stuff I do with my awesome new grip!!