Well everyone I had a great time at a party held by a friend of mine at his apartment for a poker night. However, that day I could not let the day end without a photo session to be ending the day. After meeting a great guy named Anthony Perez who is a musician who is experimenting with his talents while the festivities were going on, I just had to ask him if I could take his photograph while he was in his groove.
The location was not the best areas to take a photograph, but its the case of basically every photograph location you could find in public. In a controlled studio, sure we can get exactly the result we want, but out in the field of reality with messy rooms, and cluttered offices, and all sort of other scenarios? Not a chance. In this case it is a kitch-dining room, or a kitchen+dining room area that is found in most apartments. I had some of my trusty custom made clamps, with my umbrella brackets, and Nikon sb-28's, and not to forget some gels for drama!

Again when I set up and take most of my shots, its a quick and dirty affair. It quickly set up and then I am capturing the moments in under 5 minutes. Some say I should take more care in doing these shots, but seriously now this isn't rocket science, more or less its a baking session in creating a new tasty cake. Using my newly made multi purpose "DIY Photographic A-Clamps", i clamped two flashes to a futon, and a counter top. This is not true cross lighting but hey, it did the job. The big deal here is to work around distractions, and that is all the junk that was behind the chair that Anthony was playing on. To work around that and to make him look even more awesome playing his guitar I chose to shoot low. This gives him a "bigger than life" look that is great for people who get photographs of themselves doing things they like because they are big and into their interests; at the same time this does not allow allot of what is on the floor to get into the frame instead you see the ceiling and wall. I let Anthony pick out two gel colors before shooting to use after testing out just raw flash.


Setting my strobes to a 2:1 lighting ratio left was set at 1/8 while right was set at 1/16. Here was some of the shots!
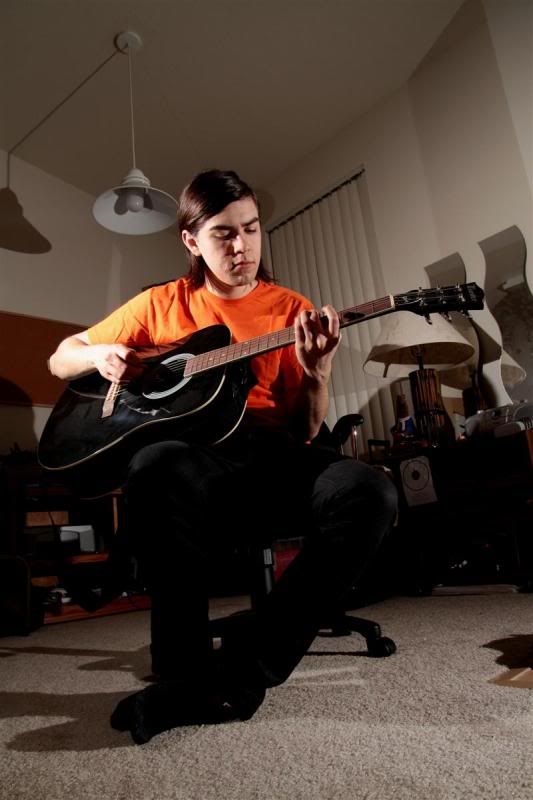
1/250 f6.3 ISO200 (Shot wide and low)

1/250 f6.3 ISO200 (Shot more towards eye level.)
After doing a few of these shots I really wanted to try the colors Anthony chose, which were light orange and deep blue. I mixed them from left and right to get some neat effects. Check it out! Note that setting were the same, but should of been different for aperture to let more light in because the gel again eats up some light when fired affecting the exposure but in the end I made the call that I thought it was not needed.

1/250 f6.3 ISO200

1/250 f6.3 ISO200 (Switched gels around to light up his face)
Again this is all experimentation. You cant be creative unless you try new things out once in a while! Stay tuned for the next entry!
No comments:
Post a Comment